| Author |
Message |
DarkHorse

az supporter


Joined: Wed Apr 14, 2010 11:30 pm Posts: 5413
Vehicle: 08 SV650

|
 Posted: Tue Jul 13, 2010 1:44 am |
|
Hey all,
So I finally got around to fitting my JC 2" body lift kit to the Vit. Everything went fine until I came to lowering the body back down - I just couldn't get all the points to line up.
By 4am thismorning I had 5 of the 8 mounts done - still loose but at least located. My issues are:
1) the the front passenger corner (under the headlight) which looks for all the world like it wants to screw in, but just won't grab a thread. I'm going to drill this one out tonight and use the nylock as per the instructions.
2) Both rear corners refuse to line up, no matter how many different ways I jack up the body, chassis or both - I even tried a ratchet strap to pull it across... Here's where they have settled now:

A mate has suggested that the chassis may have "relaxed" slightly with all the mounting bolts undone, which makes vague sense considering the positions. So... any suggestions for tweaking these into line? As you can see they don't need much, but at the moment there is nowhere near enough room to get a female 'receiver' bolt around the stud, and when the body lifts away it lifts straight up.
The next issue - and this is more of a worry - while lifting the body I managed to pull the gear lever right out of the box - it was flopping around only held in place by the boot! I pulled all the surrounding shmeg out of the way, and tried to relocate it. I got it in, and got the collar and everything to lock back in, but the lever doesn't feel right at all. What *feels* like neutral is right down where 2-4-R used to be. I thought this might just be the angle change after the lift, but there is nothing upwards - no slots or engagement where 1-3-5 should be!
If I keep pushing the lever down and away from me I can get what *feels* like 2nd, and can crawl the car around like that - but it's at the bottom of a steep hill now (the only flat bit of road I can work on it) so I might struggle to get out!
So - body mounts I'm pretty sure I can make work, I just need to revisit it with a fresh pair of eyes today (I was getting pretty vague by 4am!)
but...
What have I done to the gear lever? Pretty sure I've refitted it wrong, but how so, and how do I fix it?
Oh, and one last thing - the bullbar goes back on OK (ugly gap, but easy fix) but how have people got the rear bar to fit again? With mounts to body and the bumper stuff of the chassis it doesn't want to sit...
Really appreciate any help guys - I'm going to the snow on Sunday and I need my car driveable! 
Cheers,
Rob.
|
|
|
|
|
atari4x4
az supporter

Joined: Mon Dec 11, 2006 10:30 pm Posts: 34843 Location: East Radelayed
Vehicle: SV420+SV620 Vitara's
|
Posted: Tue Jul 13, 2010 2:01 am |
|
|
with the rear bumper, i used 3 sections of 2" square tube to space the steel bumper inner up 2" & punched new holes in the sheet metal for the lower mounts.
not sure about the gear lever... maybe it pulled out when in 2nd, can you see the shift rails when looking into the shifter hole?
it sounds like the body didn't go up square when lifting it, drilling out the front captive nut is an option & you could possibly loosen all the other mounts & re lift the body to try & line the rear 2 up.
_________________
You're just hating because you don't understand
|
|
|
|
|
DarkHorse
az supporter
Joined: Wed Apr 14, 2010 11:30 pm Posts: 5413
Vehicle: 08 SV650
|
Posted: Wed Jul 14, 2010 8:00 am |
|
Ah, righto. Have got it together again just by undoing the inner bumper mounts and 'persuading' the outer to bolt back up. Looks OK for now, but will block it out when I get a chance.
Shifter issue is sorted - as per other thread it was the little plastic end cap for the shifter rod that had fallen down into the box. Painful, but relatively easy fix and all seems good now.
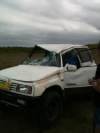
Body blocks all good - front corner I just re-tapped the hole and the bolt almost fell in. Rear corners I used a ratchet strap to pull the body stud towards the rear bar (which I rebolted to the chassis for the purpose) and that pulled them straight. Got a phone photo :

She's starting to look nice and tall! Gotta get the tyres on the rims, and the rims on the car and see how we're going for clearance.
|
|
|
|
|
DarkHorse
az supporter
Joined: Wed Apr 14, 2010 11:30 pm Posts: 5413
Vehicle: 08 SV650
|
Posted: Sat Jul 17, 2010 6:58 am |
|
Just to tie this thread up nice and neatly:
For anyone who hasn't done/seen this is the just_cruisin' kit, consisting of eight main blocks to go in the four body mounting points each side.
The front one is a bolt swap, accessed from under the headlight, and bolts back into the original welded nut:

The two under the cabin are fairly obvious - the stock nut and cup washer are replaced by the flat washer and female or receiver bolt:
 
Same with the rear corners, which are tucked away under the bumper:

I didn't get photos of the 4 smaller blocks that are scattered around as well.
All up, as I've posted before it was a pretty straightforward job, although I struggled to line the rear corners back up without the use of a ratchet strap:
The kit itself is great quality, well made and everything fits perfectly.
This is the result - for reference the body lift can be judged by the gap visible in the wheel arches (or the bullbar!):

|
|
|
|
|
lee88
Joined: Sun May 09, 2010 2:10 pm Posts: 87 Location: Perth
|
Posted: Sat Jul 17, 2010 6:10 pm |
|
Nice pics and well done nice and high now 
I'm in the process of doin mine as well
i didnt finish today.. unfortunately all my bolts were stuck in soooo tight and were incredibly hard to undo!
Such a PITA especially only with sockets and basic tools! 
oh well.. hopefully ill finish tomoro putting it back together wont be to hard XD
|
|
|
|
|
89_tintop
az supporter

Joined: Fri Aug 07, 2009 11:30 pm Posts: 3159 Location: gold coast
|
Posted: Sun Jul 18, 2010 3:34 am |
|
|
Looks good mate.....
Its amazing what a difference 2 inches can make... All you need to do know is fill those guards up with some rubber.
|
|
|
|
|
DarkHorse
az supporter
Joined: Wed Apr 14, 2010 11:30 pm Posts: 5413
Vehicle: 08 SV650
|
Posted: Mon Jul 19, 2010 12:59 am |
|
|
|
|
DarkHorse
az supporter
Joined: Wed Apr 14, 2010 11:30 pm Posts: 5413
Vehicle: 08 SV650
|
Posted: Mon Jul 19, 2010 1:02 am |
|
|
lee88 - you'll get there. It can be a bit of a PITA, but a great feeling once it's done. The harder the work the better the greater the satisfaction!
I didn't use anything much other than the socket set, trolley jack, and ratchet strap when things went pear shaped! If things are tight maybe grap a bit of pipe to extend your ratchet handle and get more leverage.
Let me know if I can help at all.
|
|
|
|
|
shane1992
az supporter
Joined: Tue Jun 08, 2010 10:09 am Posts: 782 Location: Wollongong
|
Posted: Mon Jul 19, 2010 2:40 am |
|
Have you finished yet?
What I used to fix this prblem for both my Sierra and vitara was look at what way the body has to be moved and then use a scissor jack inbetween the chassi and the body of the car or wheel and wheel arch to direct the body to make it so the bolts line up centre, just be carefull you dont dmage anything, but it really does work
I just done my sierra body lift yesty All by myself done in 5 hours with just a trolley jack and stubby rachet  haha
PM me if you nee dto know anything more mate.
Photos look sick though, tough as
|
|
|
|
|
Mick70b

Joined: Sun May 09, 2010 9:14 am Posts: 265 Location: Sydney West
|
Posted: Mon Jul 19, 2010 5:43 am |
|
That came out nicely DarkHorse, well done 
_________________
Virgil the Vitara
SV620 Estate
|
|
|
|
|
diver_dingo
Joined: Mon Jul 19, 2010 8:08 am Posts: 73 Location: Hamilton, Victoria
|
Posted: Mon Jul 19, 2010 9:40 am |
|
|
Where did you get the lift kit from? how much do they charge for them?
|
|
|
|
|
DarkHorse
az supporter
Joined: Wed Apr 14, 2010 11:30 pm Posts: 5413
Vehicle: 08 SV650
|
Posted: Tue Jul 20, 2010 8:43 am |
|
|
BYE products - just_cruizin is a member here - do a search for "body lift" and you'll find him, and all the happy customers on here.
Cost about $235 for the kit, depending on which model you have.
|
|
|
|
|
lee88
Joined: Sun May 09, 2010 2:10 pm Posts: 87 Location: Perth
|
Posted: Fri Jul 23, 2010 4:35 am |
|
|
Looks nice, ill post some pics of mine up soon to.
Yeh ive got everything sorted, except for the gear lever.
Im thinking i need to bend it, because i cant put the console back in without it getting in the way/popping it back out of gear..
Whats the easiest way to go about bending it?
Theres a rubber boot at the bottom of the lever, if i peel that back there is 2 bolts 1 on either side but im not sure if i wanna remove that as it looks like the lever goes right down into my gearbox :S
Also, Ive managed to lift both my bumpers with a fair bit of effort back was easy but front was a lil harder.
Oh and my front left brake line i twisted that downwards, but i cant get that clip back on that holds it to the body? :S
is it ok to leave it loose?
Thanks
//Lee
|
|
|
|
|
DarkHorse
az supporter
Joined: Wed Apr 14, 2010 11:30 pm Posts: 5413
Vehicle: 08 SV650
|
Posted: Fri Jul 23, 2010 8:27 am |
|
Levers are a pain - I've tried cutting out a little of the plastic, which helped a bit, then started hacking up the rubber boots (took the bottom couple of folds off to try to create some extra room.) It's driveable now but still not great, I'm going to replace the boots completely with some leather ones, and hopefully that will solve it. I also tried leaving the inner boot loose to float around as it needs to, but doesn't seem to restrict anything when it's secured.
I did the rear bumper yesterday, haven't done the bullbar yet.

Brake line should be OK as long as it's not under strain with the wheel at full droop. I think I recall others have spun the clip around and re-attached, but mine's just floating.
|
|
|
|
|
|


