| auszookers.com https://www.auszookers.com/forum/ |
|
| Step by step guide.. How to do a G16B conversion!! https://www.auszookers.com/forum/viewtopic.php?f=17&t=4853 |
Page 1 of 1 |
| Author: | zookernator [ Fri May 15, 2009 2:40 am ] |
| Post subject: | Step by step guide.. How to do a G16B conversion!! |
Recently i put a G16B 16V EFI, out of a 1994 vitara, into my 1991 sierra WT. Thought i would post up a little "how to do it" type thing for anyone that is looking into doing it. PLEASE dont dribble on with rubbish in this thread, just add things that will help.. otherwise it will be 20 pages long full of crap.. and pretty much pointless!! Well, i got an adaptor kit from BenT (through outerlimits.com). This cost $200AU inc shipping to my house. In the kit, you get eng mount adaptors, bell housing adaptor plate, studs etc etc, and very detailed instructions!! I got the motor locally with lume, comp, starter, airbox, dash, and exh manifold. I also got the EFI fuel tank. Firstly i removed the old 1.3.. RIP.
Nows a good time to clean the eng bay! My zook is SOA, so i didnt need to alter the sump. If yours isnt SOA, there is heaps of info about altering the sump around this forum! Next i prepared the 1.6. Put the 1.3 flywheel, clutch and pressure plate onto the new 1.6. Like most of the conversion, Its a bolt on fit
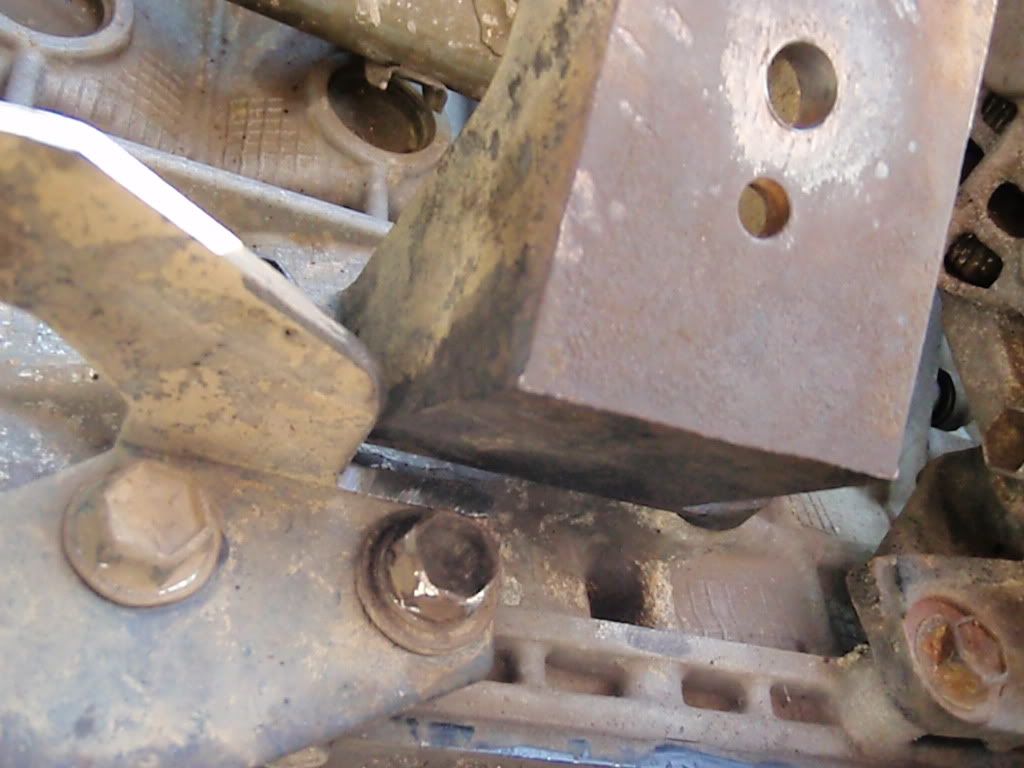
The intake side 1300 mount needed the holes to be opened up a tad (2mm or so).. so it could fit the block. A round file took care of that!
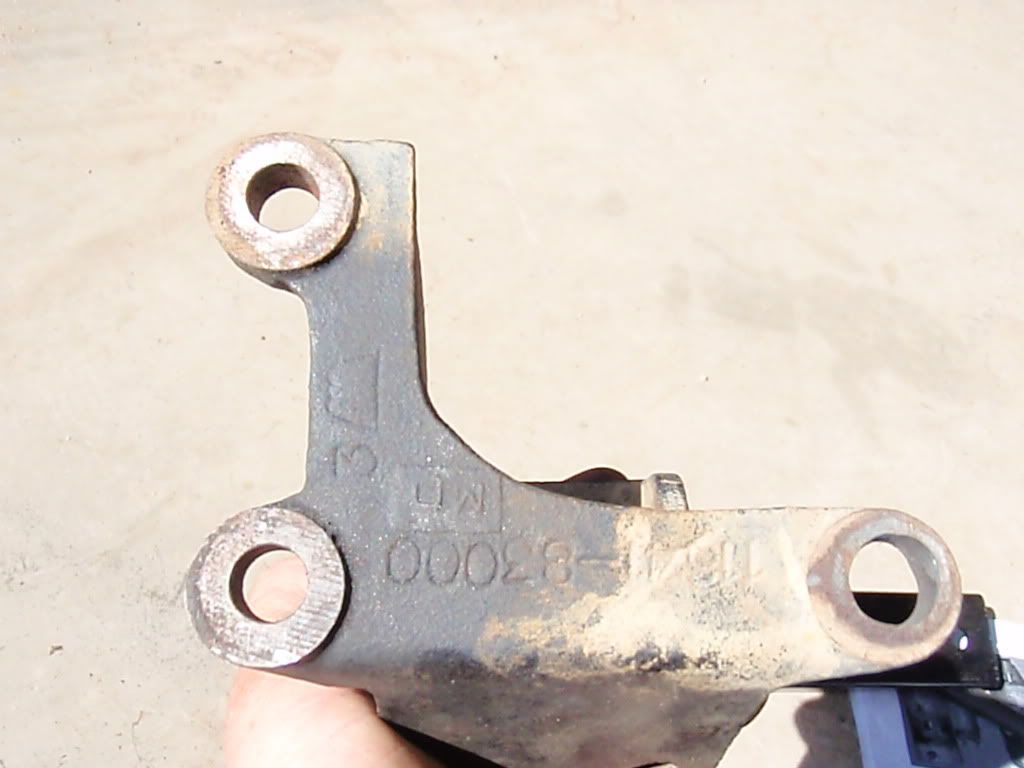
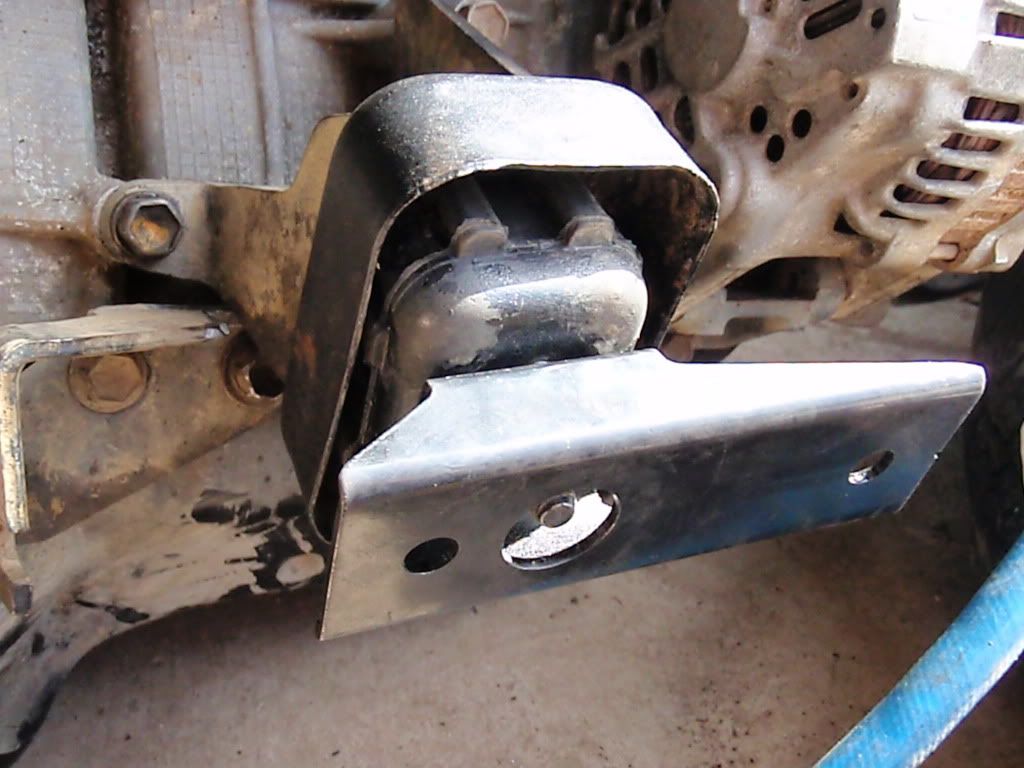
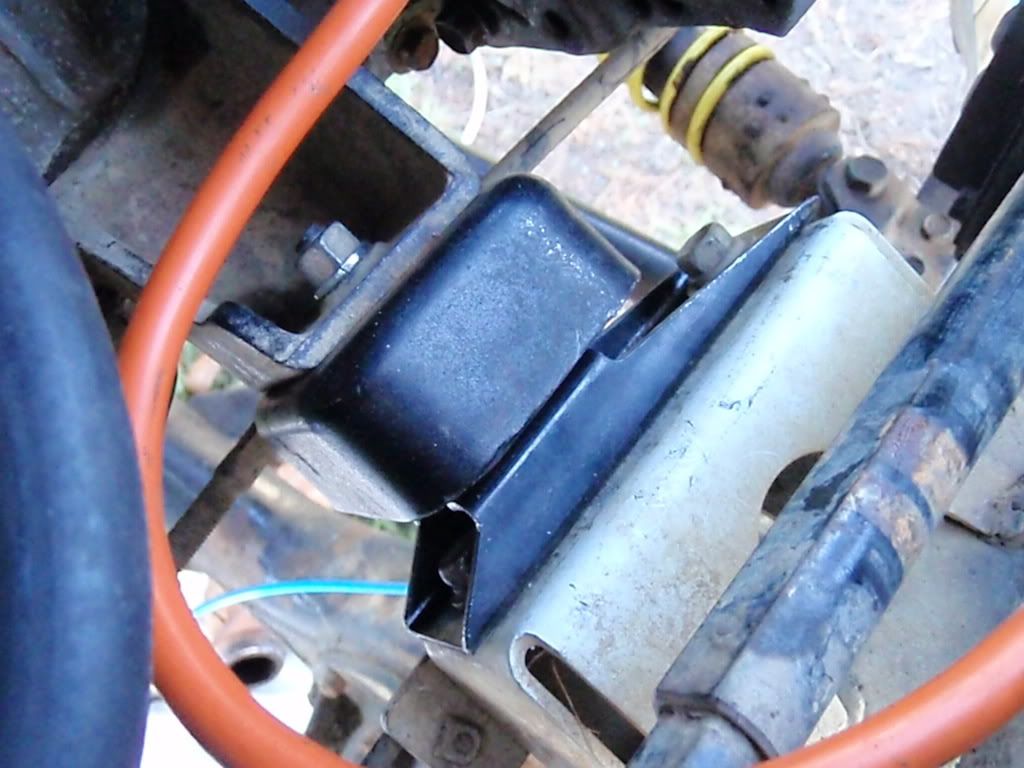
Now, another part of BenT's kit!! Bolt the box section eng mount adaptor to the rubber eng mount..
Now, to fit the 1.3 clutch cable bracket to the 1.6, i had to cut a small triangular shape out of the bracket, so it would clear the eng mount.
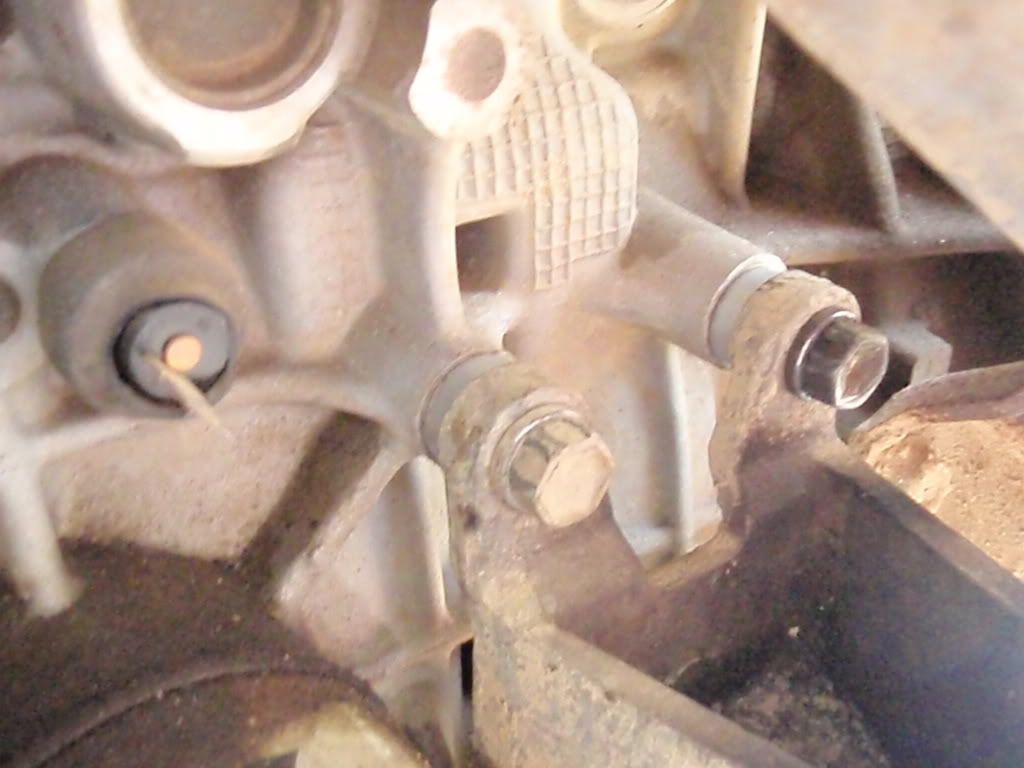
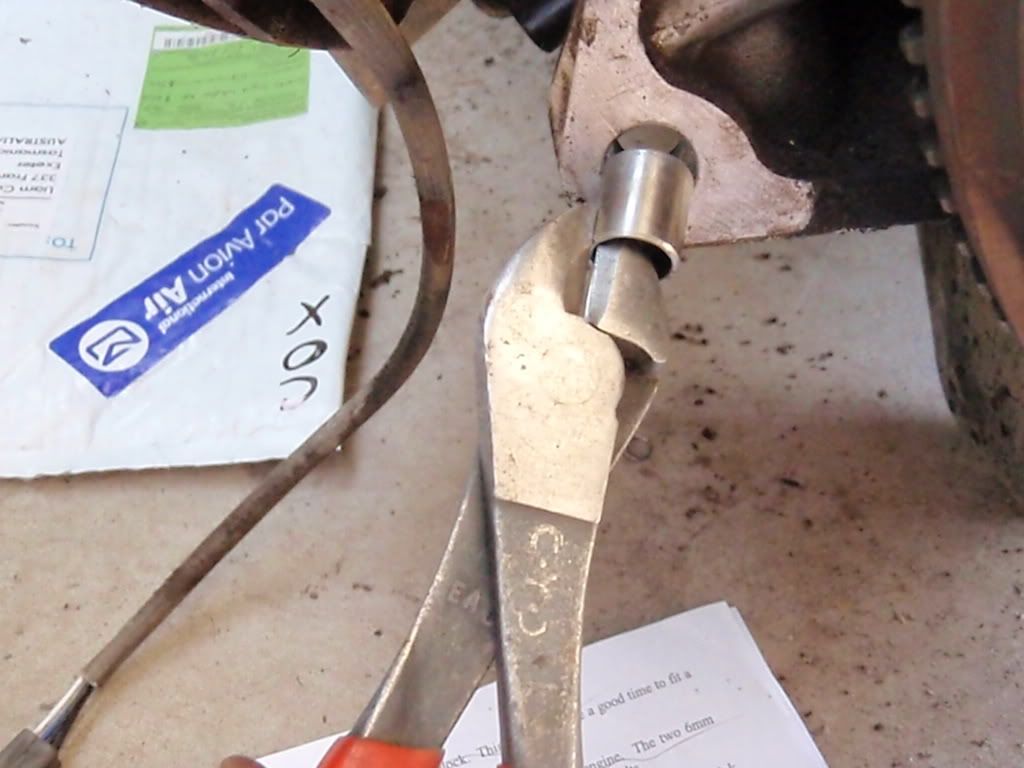
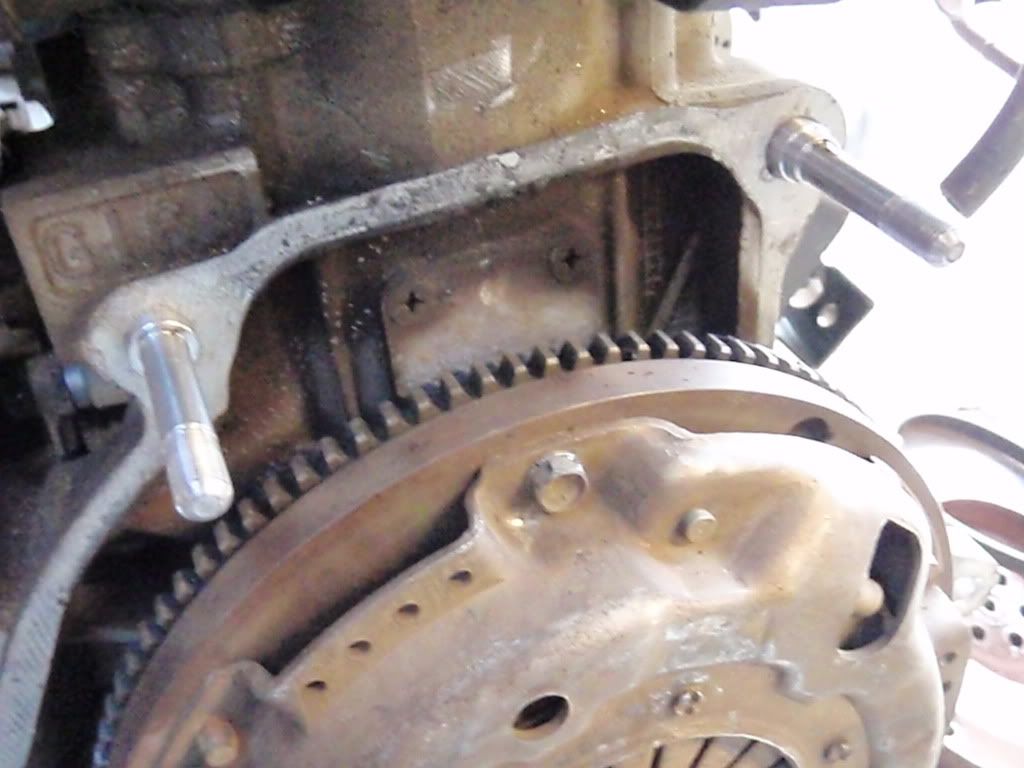
then in the back of the block, i removed the 2 tubular dowels, and then removed the 2 studs from the gearbox.
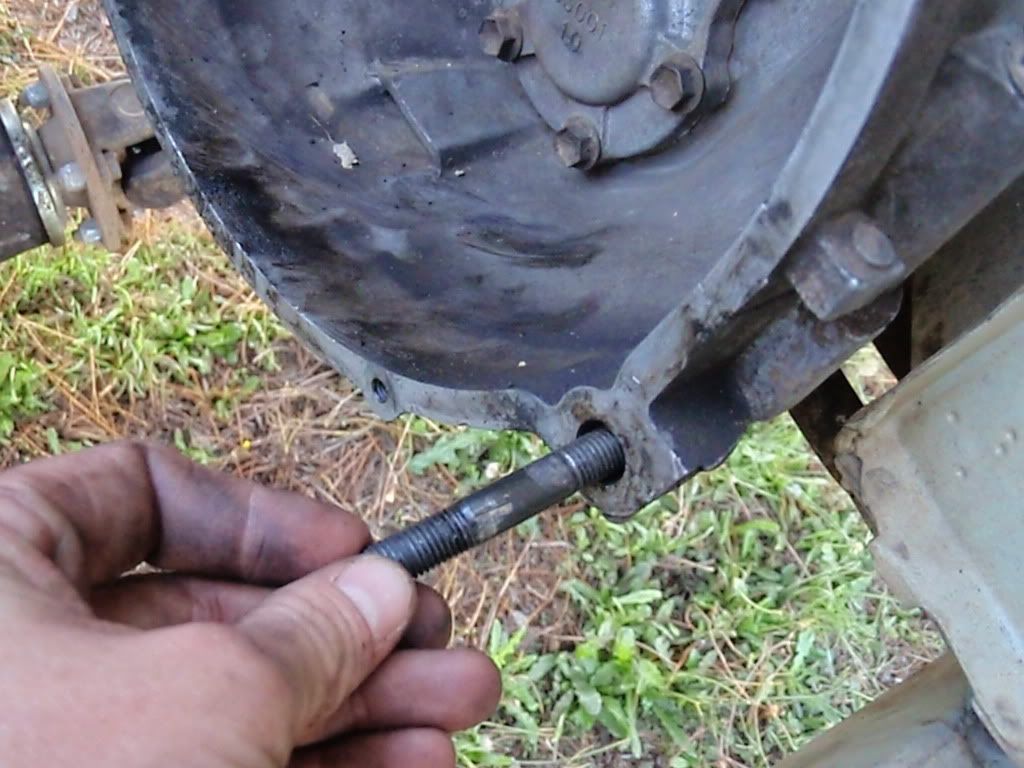
Now again in the BenT kit, get out the 2 studs, and the 2 countersunk cap screws. Put the 2 studs into the top 2 holes in the block, with the longer stud going into the hole that had the dowel.
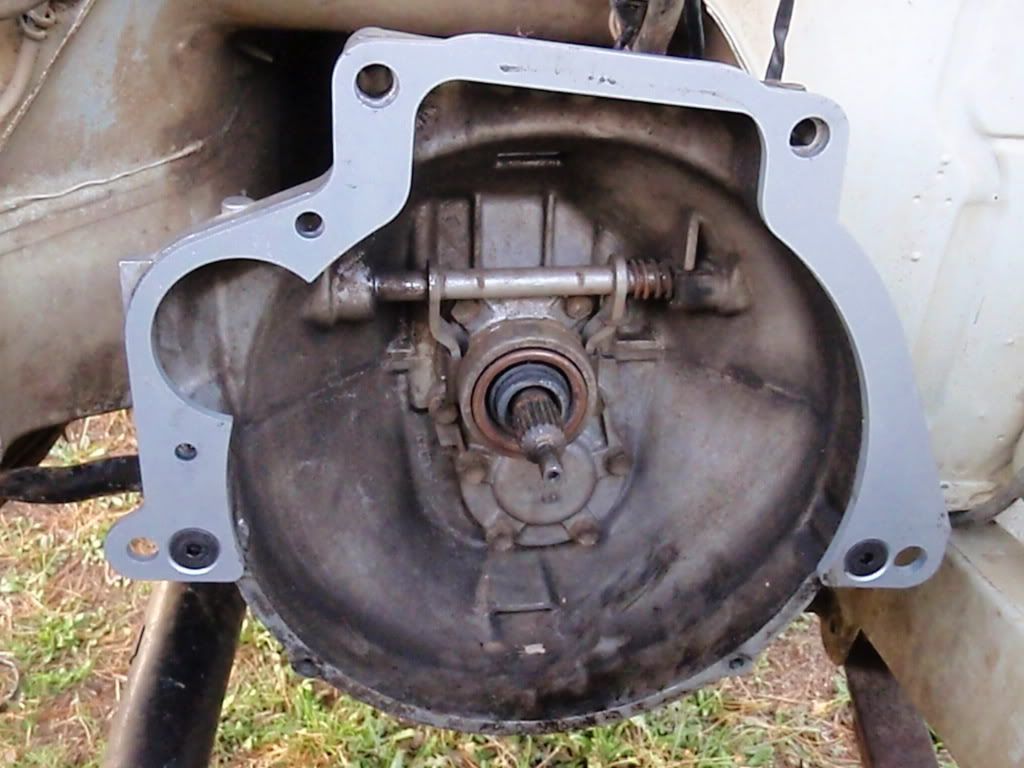
Then i bolted the adaptor plate to the gearbox.. using the 2 countersunk cap screws.
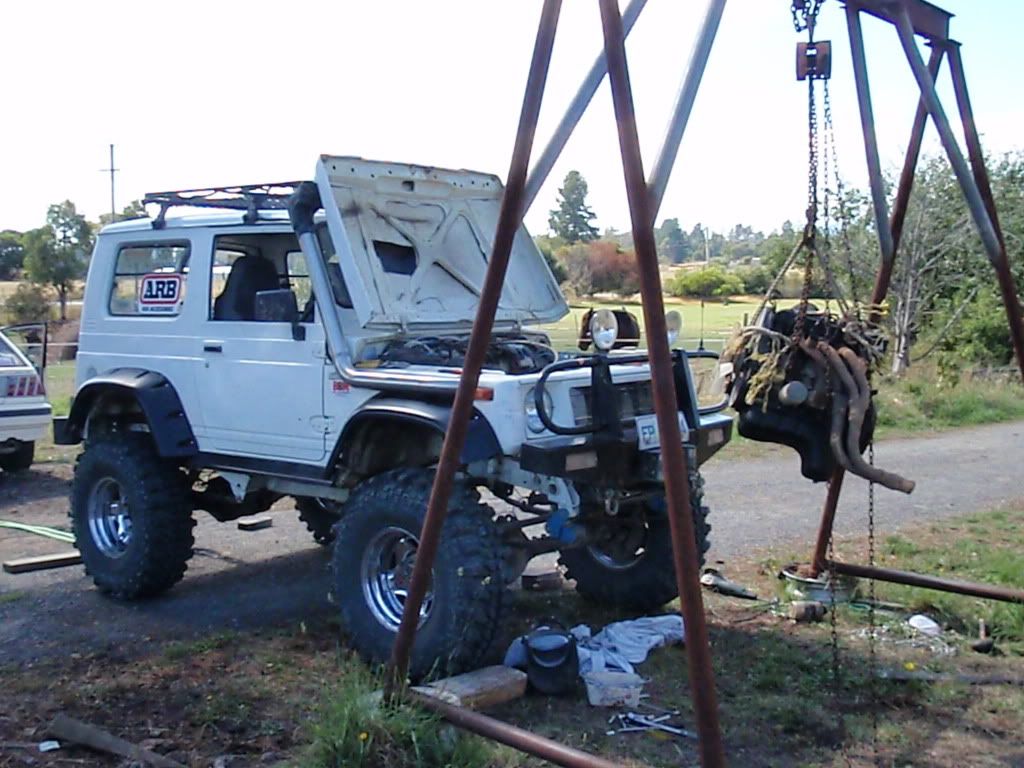
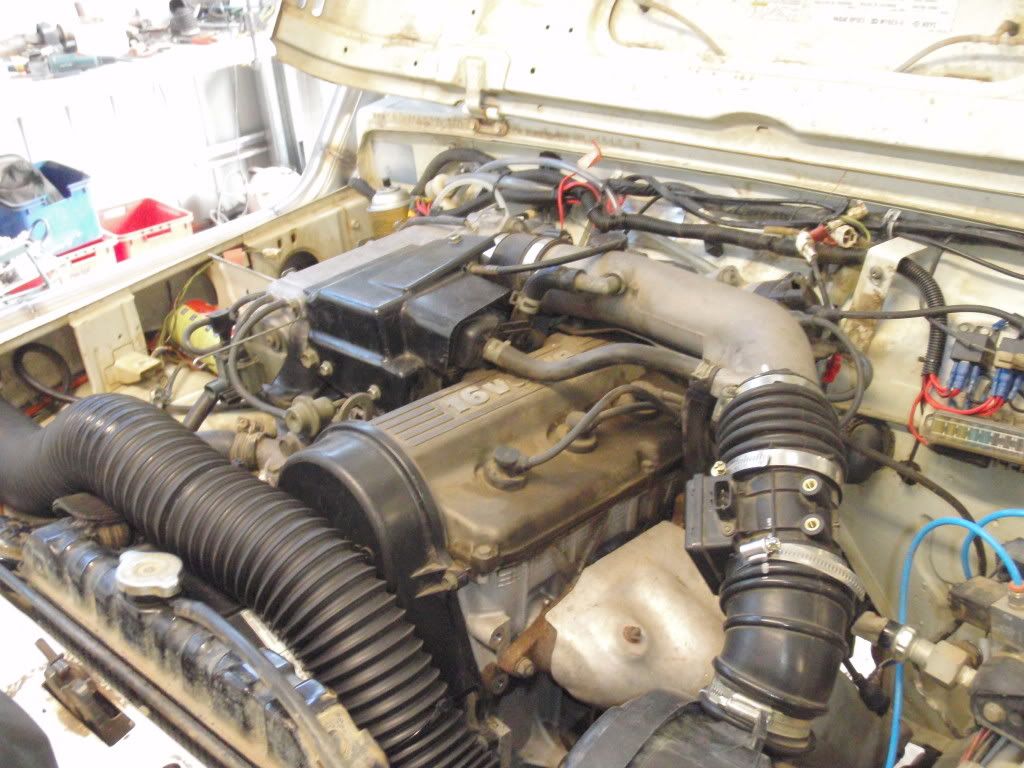
Now you can put the new 1.6 in place!! Lower it in, and then bolt it up to the gearbox using the parts that are in the BenT kit. I had to loosen the gearbox mount to enable the eng mounts to line up so i could bolt them on.. think this is a common thing to do though. As for the starter motor, it says everywhere to use the 1.6, cause its narrower. The starter that came off my 1.6 is exactly the same as the 1.3 starter!! So i put the 1.3 starter onto the new motor (cause it was fairly new).. and it works fine!! Not sure what happened there.. but im happy. You can get a 1.3 starter to fit, it just needs grinding. There is info about this on the forum though. Heres the motor sitting in place..
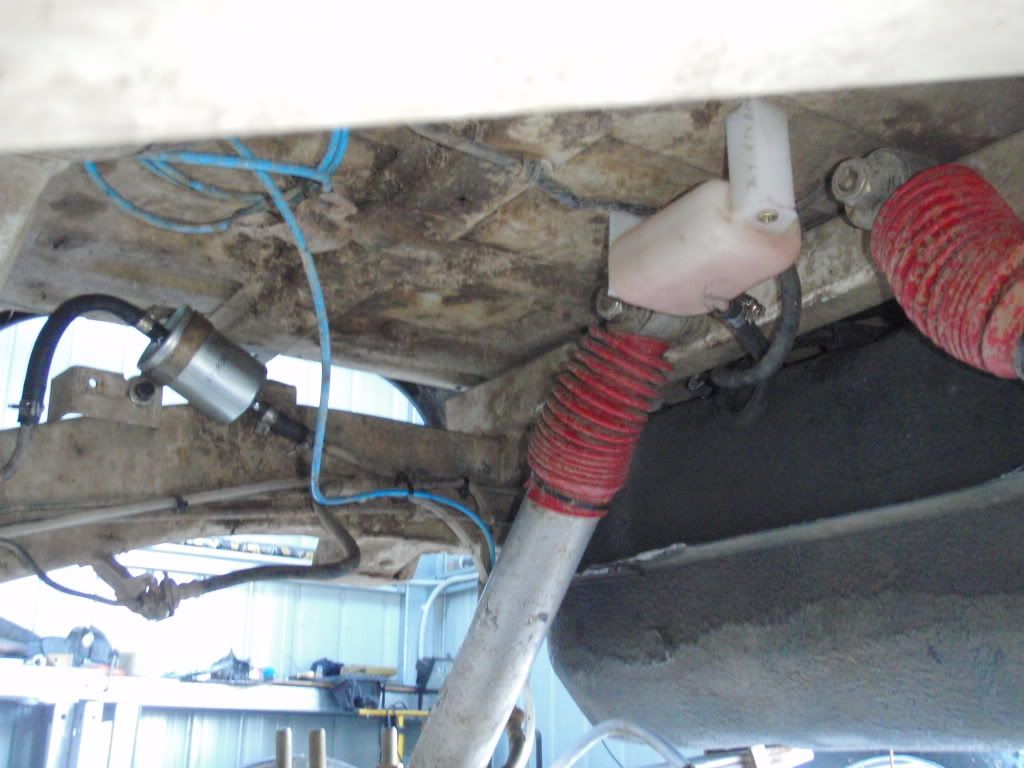
As for the EFI fuel line side of things, i brought some EFI hose, EFI filter, and EFI hose clamps.. and replaced the non EFI hose/filter with it. I did continue to use the original steel fuel line that runs along the chassis though, which saved heaps of mucking around! I made up some mounts for the new tank. This is one hell of a tight fit!! I have a custom rear shocky bar, which just allowed enough room. But using this tank made life easier, cause the pump is built inside the tank. I lost no depature angle/clearance either!!
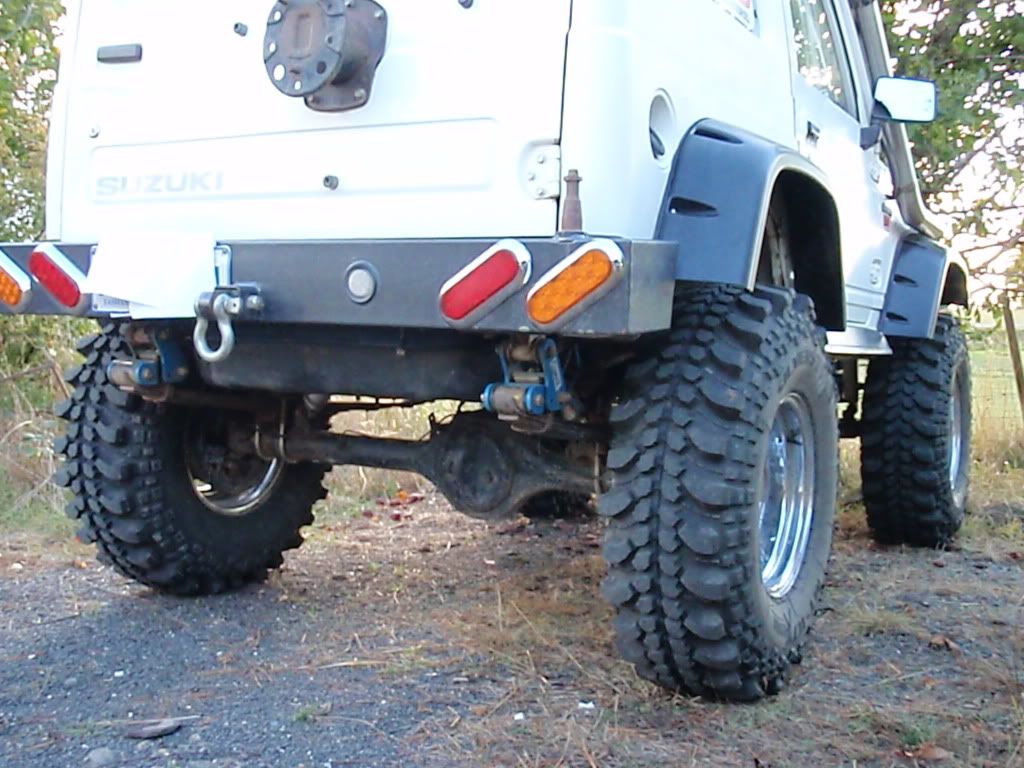
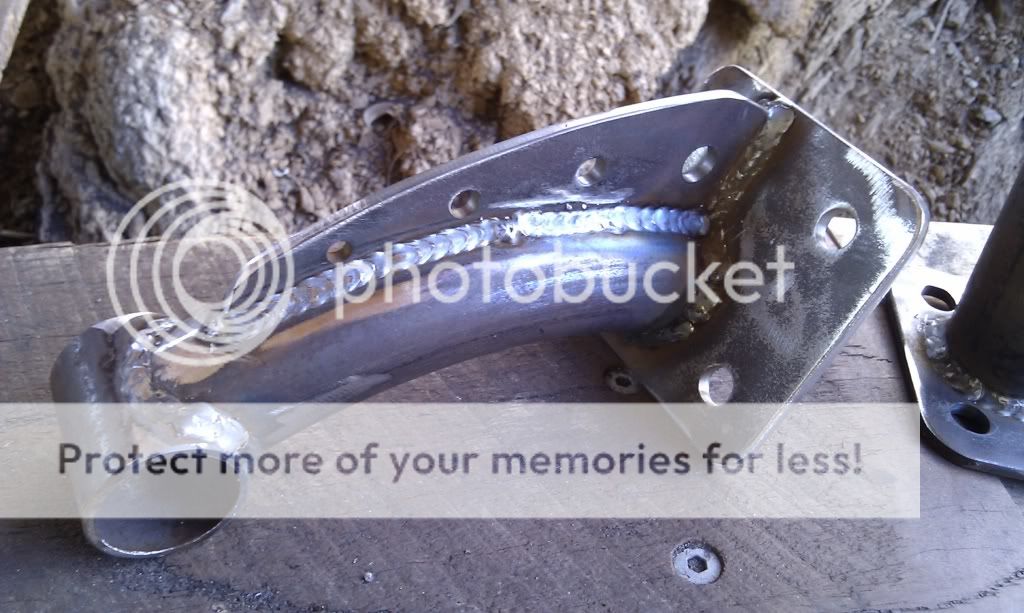
All of the heater hoses and radiator hoses hooked straight up to the 1.6, cause their in the same spot!! As for the radiator, alot of people do run their 1.3 radiator with the 1.6 eng.. i tried, but didnt work.. kept overheating. A clean out of the radiator would have fixed it.. but for the same price i got a 1.6 radiator.. few custom mounts and it fits in beautiful. The exhaust, sometimes the manifold will hit the chassis rail. I was lucky again.. mine misses by about 15mm. If it does hit, they say extractors will clear. The eng pipe i used is off an SS commodore.. the flange etc was the same!! Next was the wiring. I got help with this..it was a nightmare!! this isnt all of what i started with.. there was more!!
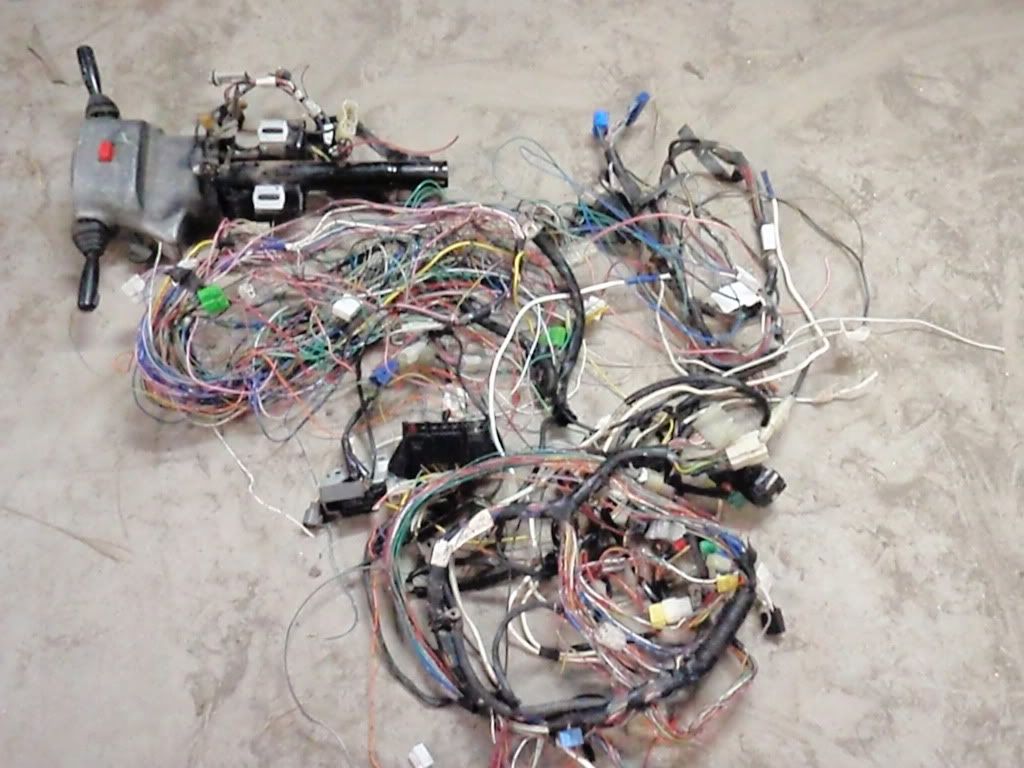
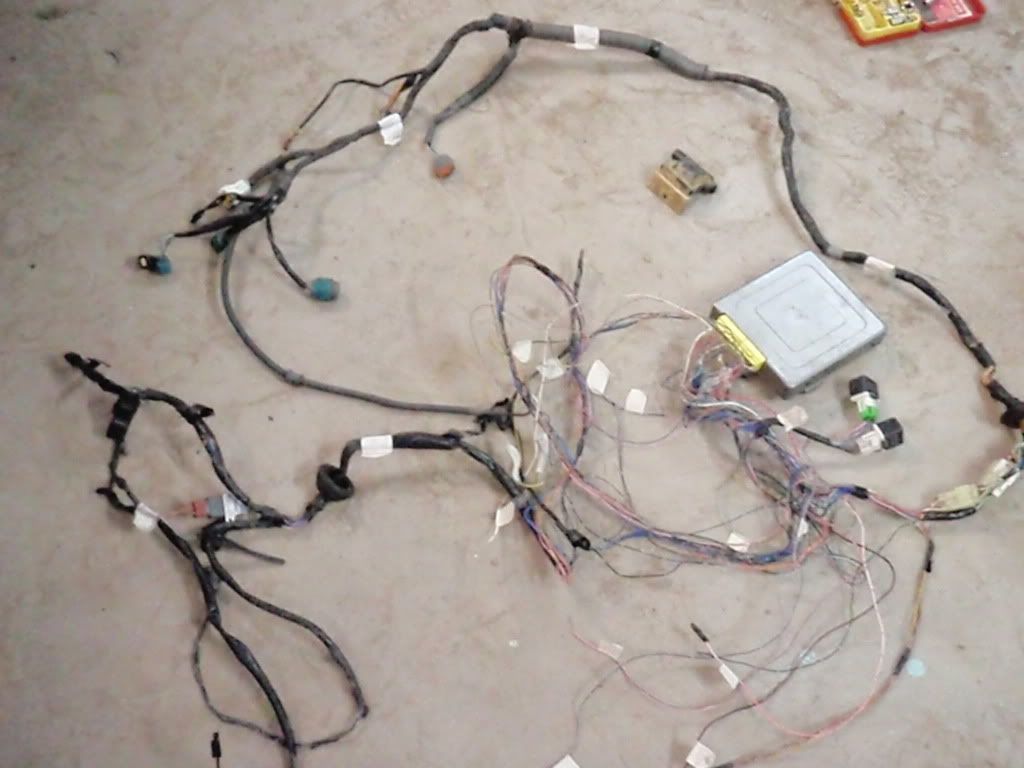
but i ended up with this
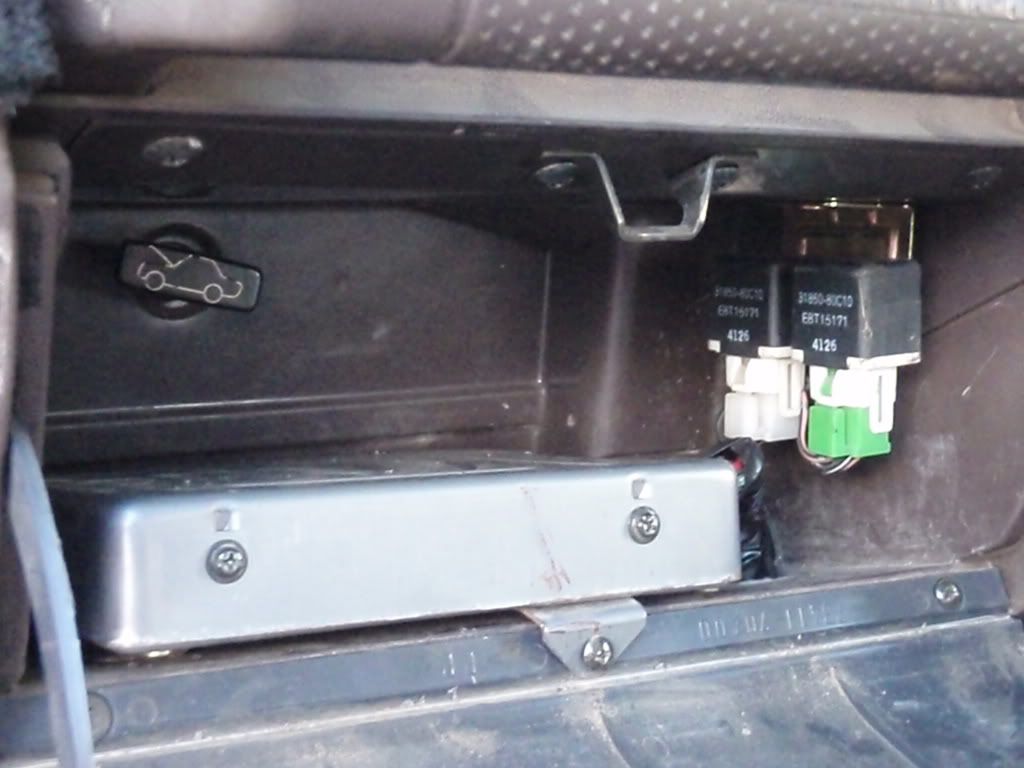
It was a pain to get the right diagram too.. www.suzukiinfo.com have all the wiring diagrams on their site for free!! If not, ask around.. heaps of people have them on their harddrive. Pretty much, you have to sort out what you do, and dont need. For eg.. you dont need the 1.6 interior light.. so snip snip. But you do need the 1.6 starter signal.. so dont snip snip. But before you do snip, you have to make sure that the wire doesnt supply power (or earth) to something else that you do need!! Its a pain in the arse!! You can buy lumes ready to go from USA.. or ask around on the forum, theres a couple of people that have done a bloody good job in the past that may be interested in helping you!! But it is a VERY time consuming job.. and a job that shouldnt be stuffed up.. so it may cost a fair few $$. I ended up mounting the comp, relays and diognostic plugs in the dash.
Now the VSS (vehicle speed sensor).. apparantly this has to be hooked up for a few reasons.. to tell the comp what speed your doing (or something like that).. which in return provides better fuel economy, but the most important, to stop that check eng light from staying on!! There a couple of ways to do it.. at the bottom of this page is one way to do it http://www.azrockcrawler.com/_images/te ... otor2.html I did mine a similar way. I pulled apart the 1.6 and 1.3 dashes, and got to the speedo mechanisims (speedo).
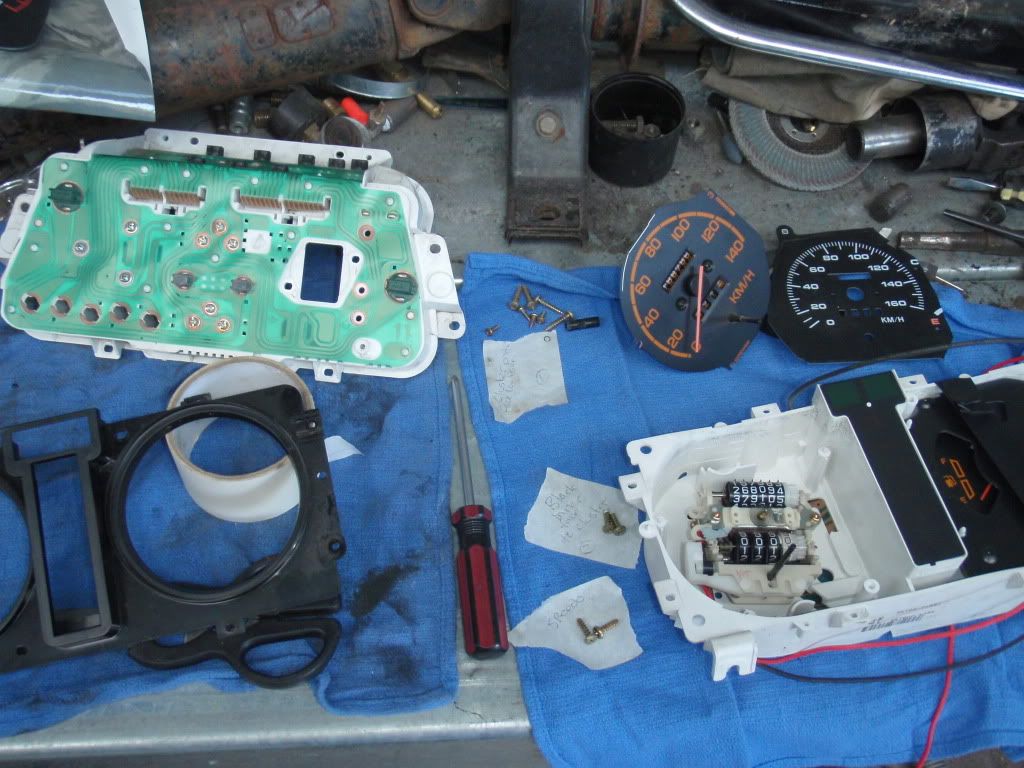
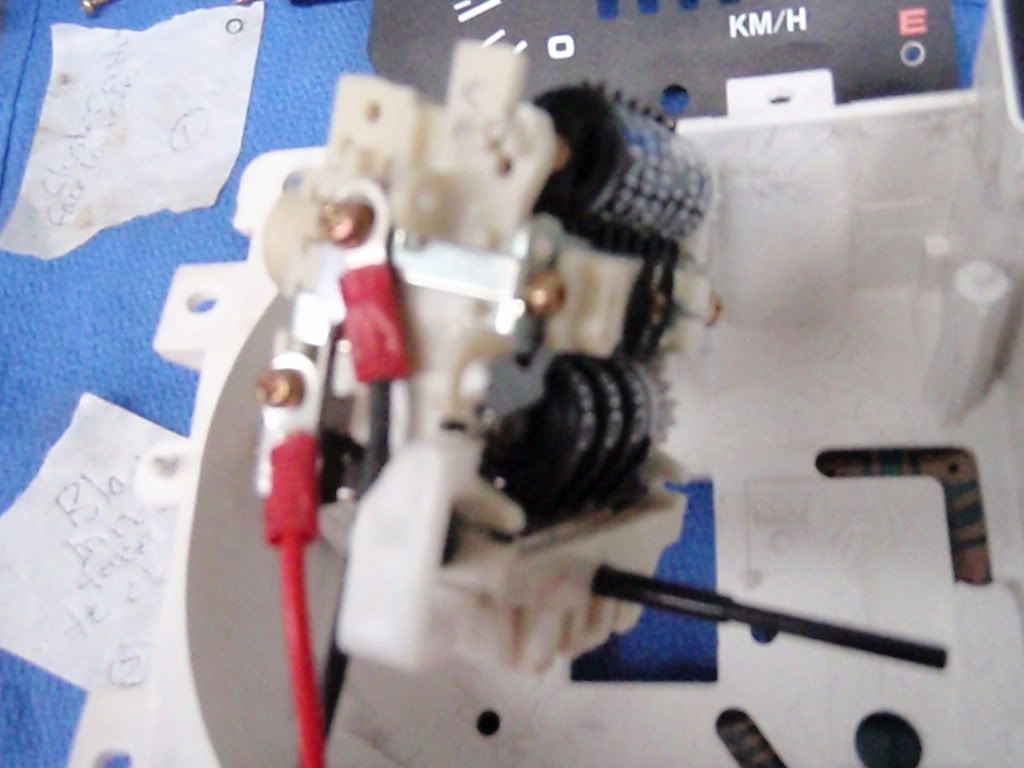
On the 1.6 cluster, is the VSS. Its a lovely little thing.. which is very hard to describe. Its this thing here that has the 2 wires coming off it!
The 1.3 speedo was put aside.. and i then prepared the 1.6 speedo. I then hooked up the 2 wires, as pictured (remember this is on the 1.6 speedo now!!). The red one goes to the comp, the black one goes to earth. The 1.6 speedo will bolt straight back into the 1.3 cluster. The only thing that doesnt line up now is the backing plate (that has the speed etc on it). I cut the 1.3 and 1.6 plates in half, and put the 1.6 backing plate into the 1.3 cluster (same as the speedo.. so now its a 1.3 cluster and 1.3 backing plate, except for the speedo and the speedo backing plate, which is 1.6)
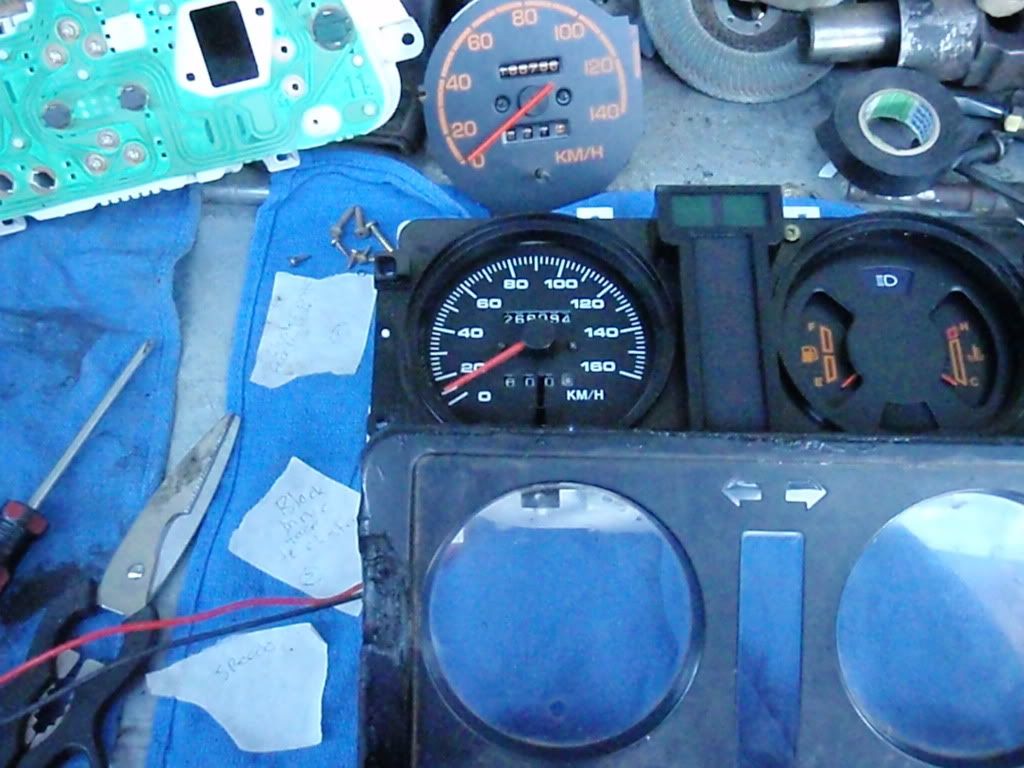
I cant think of anything else to put in here.. oh, heres what i did with the airbox. I used the 1.3 airbox, with the 1.6 air flow metre. Pictured here is the 1.3 radiator.. i now have the vitara radiator, so this set up has changed slightly.
Oh, i have 1" body lift.. and with this, it clears by about 2mm!!! Something else to consider. The outcome is awesome.. im in love with EFI now!!!! Hope this helps.. |
|
| Author: | zookernator [ Fri May 15, 2009 2:57 am ] |
| Post subject: | Re: How to do a G16B conversion!! |
Oh, and this is copywrighted too.. meaning it is not for outerlimits!!!! haha |
|
| Author: | shep [ Fri May 15, 2009 3:05 am ] |
| Post subject: | Re: How to do a G16B conversion!! |
zookernator wrote: Oh, and this is copywrighted too.. meaning it is not for outerlimits!!!! haha
lol good job mate. did you put the 1.3 sump on? |
|
| Author: | 11_evl [ Fri May 15, 2009 10:35 am ] |
| Post subject: | Re: How to do a G16B conversion!! |
My zook is SOA, so i didnt need to alter the sump. If yours isnt SOA, there is heaps of info about altering the sump around this forum! Next i prepared the 1.6. |
|
| Author: | zookernator [ Fri May 15, 2009 11:55 am ] |
| Post subject: | Re: How to do a G16B conversion!! |
shep wrote: zookernator wrote: Oh, and this is copywrighted too.. meaning it is not for outerlimits!!!! haha lol good job mate. did you put the 1.3 sump on? no matey.. left the 1.6 as standard.. |
|
| Author: | 11_evl [ Fri May 15, 2009 12:25 pm ] |
| Post subject: | Re: How to do a G16B conversion!! |
by the way. GREAT WRITE UP. WELL DONE im impressed with the BenT kit, well worth the $200 |
|
| Author: | shep [ Fri May 15, 2009 12:28 pm ] |
| Post subject: | Re: How to do a G16B conversion!! |
zookernator wrote: shep wrote: zookernator wrote: Oh, and this is copywrighted too.. meaning it is not for outerlimits!!!! haha lol good job mate. did you put the 1.3 sump on? no matey.. left the 1.6 as standard.. i am SUA and left the 1.6 sump on, however lots of lift and moved the diff. |
|
| Author: | rkhair [ Mon Mar 15, 2010 9:55 am ] |
| Post subject: | Re: Step by step guide.. How to do a G16B conversion!! |
Hello man, Nice Job, Im buying the conversion kit from Ben soon, I have a 1994 Suzuki Samurai and Im preparing to convert its 1.3 standard engine into 1.6 Vitara but I have a small question>I didnt understand the part of the speedo meter, I just need to change the dash only right? No need to open the mechanism and play with it! Concerning the lift kit, I dont know if I need to make it or not for the 1.6 cc 16 valce Regards, |
|
| Author: | Taff [ Mon Mar 15, 2010 4:18 pm ] |
| Post subject: | Re: Step by step guide.. How to do a G16B conversion!! |
cutting off the 1.6 mount
the modified mount, done in vice
sump bashing
braised and mounted
1.6 end onto the 1.3 pickup
|
|
| Author: | reeceh [ Sun Jan 23, 2011 9:26 am ] |
| Post subject: | Re: Step by step guide.. How to do a G16B conversion!! |
Hello it says u had a bodylift and were worried about clearences. Clearences for what exactly, I plan on doing this conversion very soon and am wondering if u need a bodylift as i currently dont have one and dont plan on on installing one. |
|
| Author: | alien [ Sun Jan 23, 2011 12:52 pm ] |
| Post subject: | Re: Step by step guide.. How to do a G16B conversion!! |
i run 1.6 efi, with efi sump and jimny top end with no bodylift... pre-SPOA it still fit just fine. |
|
| Author: | reeceh [ Mon Jan 24, 2011 6:05 am ] |
| Post subject: | Re: Step by step guide.. How to do a G16B conversion!! |
Id like top know if it will fit just the standard g16b without bodylift. |
|
| Author: | zookernator [ Mon Jan 24, 2011 9:03 am ] |
| Post subject: | Re: Step by step guide.. How to do a G16B conversion!! |
The top of my G16B just touches the bonnet.. and i'm running a 1" body lift. |
|
| Author: | reeceh [ Mon Jan 24, 2011 10:07 am ] |
| Post subject: | Re: Step by step guide.. How to do a G16B conversion!! |
ill just have to modify the bonnet a little bit, its the only perks of living next to a panel beater. |
|
| Author: | stiky [ Sun Jan 30, 2011 8:56 am ] |
| Post subject: | Re: Step by step guide.. How to do a G16B conversion!! |
i ave a G16A with no body lift but my bonet wouldnt close if i didnt have a gay little bonnet scoop |
|
| Author: | reeceh [ Mon Jan 31, 2011 5:24 am ] |
| Post subject: | Re: Step by step guide.. How to do a G16B conversion!! |
ill do the bonnet scoop, i hate body lifts |
|
| Author: | alex [ Mon Jan 31, 2011 5:58 am ] |
| Post subject: | Re: Step by step guide.. How to do a G16B conversion!! |
reeceh wrote: ill do the bonnet scoop, i hate body lifts
or better yet buy these engine mounts which lowwer your engine so you dont need any bonnet mods http://www.petroworks.com/Products.php? ... ductID=218 i got them here is my build thread, no i dont have a body lift: http://www.auszookers.com/index.php?nam ... &start=360 |
|
| Author: | Fatzook [ Mon Jan 31, 2011 6:55 am ] |
| Post subject: | Re: Step by step guide.. How to do a G16B conversion!! |
alex wrote: reeceh wrote: ill do the bonnet scoop, i hate body lifts or better yet buy these engine mounts which lowwer your engine so you dont need any bonnet mods http://www.petroworks.com/Products.php? ... ductID=218 i got them here is my build thread, no i dont have a body lift: http://www.auszookers.com/index.php?nam ... &start=360 Or build some of these and fit a G16B under your 1L bonnet with no body lift
|
|
| Author: | 85zooki [ Tue May 17, 2011 9:46 am ] |
| Post subject: | Re: Step by step guide.. How to do a G16B conversion!! |
What about the throttle cable dose the 1.3 one work on a vitara g16b |
|
| Author: | Fatzook [ Tue May 17, 2011 11:11 am ] |
| Post subject: | Re: Step by step guide.. How to do a G16B conversion!! |
85zooki wrote: What about the throttle cable dose the 1.3 one work on a vitara g16b
I've always use the vit throttle cable, as it has a 90 degree bend in it. The end just needs modifying. I just drill through the ball socket and put a bolt right through it. |
|
| Author: | 85zooki [ Wed May 18, 2011 5:25 am ] |
| Post subject: | Re: Step by step guide.. How to do a G16B conversion!! |
What about the throttle cable dose the 1.3 one work on a vitara g16b |
|
| Author: | suzi-fan-22 [ Mon Aug 15, 2011 10:52 pm ] |
| Post subject: | Re: Step by step guide.. How to do a G16B conversion!! |
Fatzook wrote: alex wrote: reeceh wrote: ill do the bonnet scoop, i hate body lifts or better yet buy these engine mounts which lowwer your engine so you dont need any bonnet mods http://www.petroworks.com/Products.php? ... ductID=218 i got them here is my build thread, no i dont have a body lift: http://www.auszookers.com/index.php?nam ... &start=360 Or build some of these and fit a G16B under your 1L bonnet with no body lift ![]() ![]() Where can I get some of those? are they rubber mounted? And how much lower are they how much sump chopping would I have to do with SPUA? |
|
| Author: | Myles [ Fri Sep 04, 2015 3:24 pm ] |
| Post subject: | Re: Step by step guide.. How to do a G16B conversion!! |
This is awesome! I've got a G16B engine lined up with a wiring loom, I've also got a G16B fuel tank with fuel pump and a BenT adapter kit. What else do i need? Besides a Vitara dash? will be going in to my Coily. |
|
| Author: | MrRocky [ Sat Sep 05, 2015 6:20 pm ] |
| Post subject: | Re: Step by step guide.. How to do a G16B conversion!! |
Dont need to do the vss mod at all My economy is 9.4 litres per 100km on hwy and 11 litres driving like a hoon around the city. Thats on 32"s and direct km comparison to a stock jimny to compensate for tyre/tcase |
|
| Author: | justinboo [ Tue Aug 01, 2017 10:24 pm ] |
| Post subject: | Re: Step by step guide.. How to do a G16B conversion!! |
Any chance on reloading the photos? Sent from my iPhone using Tapatalk |
|
| Page 1 of 1 | All times are UTC + 9:30 hours |
| Powered by phpBB® Forum Software © phpBB Group https://www.phpbb.com/ |
|